My mother-in-law contacted me a month ago and asked if I would be interested in making a t-shirt quilt for her friend. Her friend had two older children and she had had t-shirt quilts made for their high school graduation. Her third child was graduating and the lady that made the original quilts didn’t do it anymore. I was originally hesitant. I had quilted many pillows, doll, and baby quilts by hand. I had minimal machine quilting experience (although I had sewn on a machine quite a lot). However, I had never made a t-shirt quilt, or even a full sized quilt for that matter. I was nervous about messing up someone else’s t-shirts/memories. I asked if I could see a picture of the other quilts to see how fancy they were. They were quite simple, and I decided that I could do it. I read tutorials, bought books, and finally just learned through a lot of trial and error. I had less than three weeks to make the 49 t-shirt, 104″ x 104″ quilt. I finished it the night of graduation, barely making my deadline. I’m not pretending to be an expert, but I did want to share my newly-found wisdom below. The tutorial assumes the user knows the basics of machine sewing.

Materials Needed:
You can either purchase an appropriately sized sheet set for your final quilt size to use as backing and strips to go between the t-shirts, or you can by fabric. The amount you need depends on how big your quilt is. Here are some calculators that will help you determine how much of each material you will need. I would suggest reading through the tutorial and understanding the purpose of each material before purchasing anything.
- T-shirts
- Interfacing/stabilizer
- Quilt batting
- Biased tape or extra fabric to make your own
- White multipurpose thread (or color of your choice for piecing, white works well for most projects)
- Colored quilting thread to go with your final design
Required/Suggested Tools:
- Sewing machine with walking foot
- Scissors
- Seam ripper
- Sewing tape measure
- Iron
- Rotary cutter
- Acrylic ruler
- Cutting mat
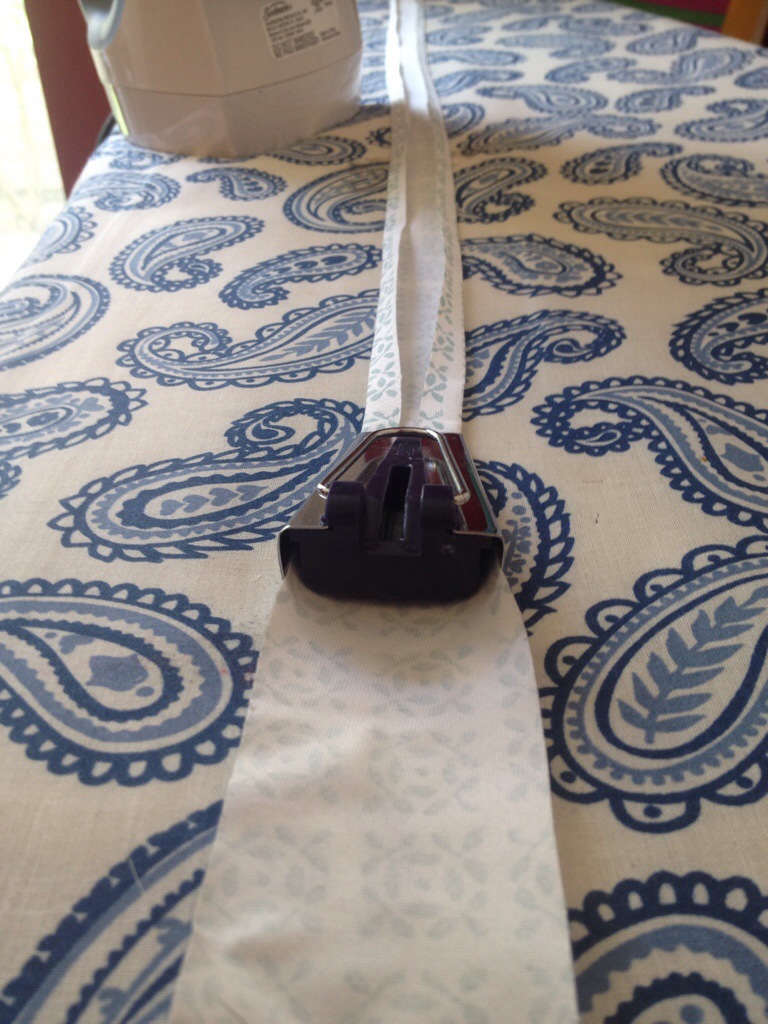
- Biased tape maker
- 100s of straight and curved safety pins
Instructions:
- The first thing you should do is plan out your t-shirt layout and figure out an appropriate size for your t-shirt blocks. My client gave me a layout when she gave me the t-shirts. She also gave me two sheet sets, one to be used for the back and one to be used for the strips on the front. The flat sheet to be used for the back was 104″ x 110.” Without splicing anything on the back, the largest quilt I could make was 104″ x 104.” If I used 2″ strips between each shirt and on the outsides, the largest t-shirt block I could use was 12.5″ (8 x (2″ strips) + 7 x (12.5″ t-shirt blocks) + 2 (0.25″ seam allowance) = 104″). I measured the blocks and the design on the vast majority of them fit within a 12.5″ square. I had two problem squares (more on them later). I decided that the blocks would be 12.5″ square with 2″ strips between them.

- Wash all of your t-shirts without fabric softener.
- The next step is to start cutting! For each shirt, first cut the sleeves off. After that, cut up the side seams and shoulder seams. The shirt is now separated into a front and back portion. Sometimes you’ll want to use the front, sometimes you’ll use the back, sometimes you’ll use both for the design.

- Next you’ll need to stabilize each shirt. Because t-shirts are stretchy, you need to purchase fusible interfacing/stabilizer to iron onto the back. You should cut pieces of interfacing that are at least 1″ wider and longer than your intended final t-shirt block size. For my 12.5″ square blocks, my minimum interfacing size was 13.5″ square. This is when you should pull out your rotary cutter, acrylic ruler, and cutting mat. (You can see mine in the picture above.) I would strongly encourage you to invest in these tools. The really help you line things up and make nearly perfect cuts that will make all of the later steps much easier. For this step, the preciseness of your cuts isn’t that important and it’s a good chance to practice with your rotary set. Read the tip below before you start.
Tip: Instead of completing all of one step them moving to another, I would suggest that after you finish one step for a few t-shirts then try the next step. This breaks up the monotony of doing something many times (49 in my case) in a row. You also often find a better way to do the previous step. For example, I started out cutting my interfacing very precisely 13.5″ by 13.5.” When I started ironing it on, I found that for the dark colored shirts, it was almost impossible to line it up correctly. I also learned that for a small woman’s shirt, I couldn’t make the interfacing much wider than 13.5.” I started cutting the interfacing 13.5″ by 15″ so there was some more room for error on the dark t-shirts. I also quit worrying about these cuts being perfect, which saved a lot of time. These are the only cuts that don’t have to be perfect. Enjoy it while you can.
- The purpose of fusible interfacing is that one side (the bumpy side) has a glue that is activated by heat. Place a t-shirt face down on your ironing surface. Iron the t-shirt to remove any wrinkles. Line up the interfacing so that it is centered over your design, bumpy side down. You’ll find that the designs on many shirts are closer to the top of the shirt. In that case, center the interfacing width-wise and place the top of your interfacing directly below the neck of the shirt. You’ll find that dark shirts are very hard to line up. Iron the interfacing on. You’ll find that your t-shirt will try to stretch during the ironing process. Some people suggest placing the iron on an area for a few second, then picking it up and moving it a few inches until the interfacing is completely fused to the fabric.
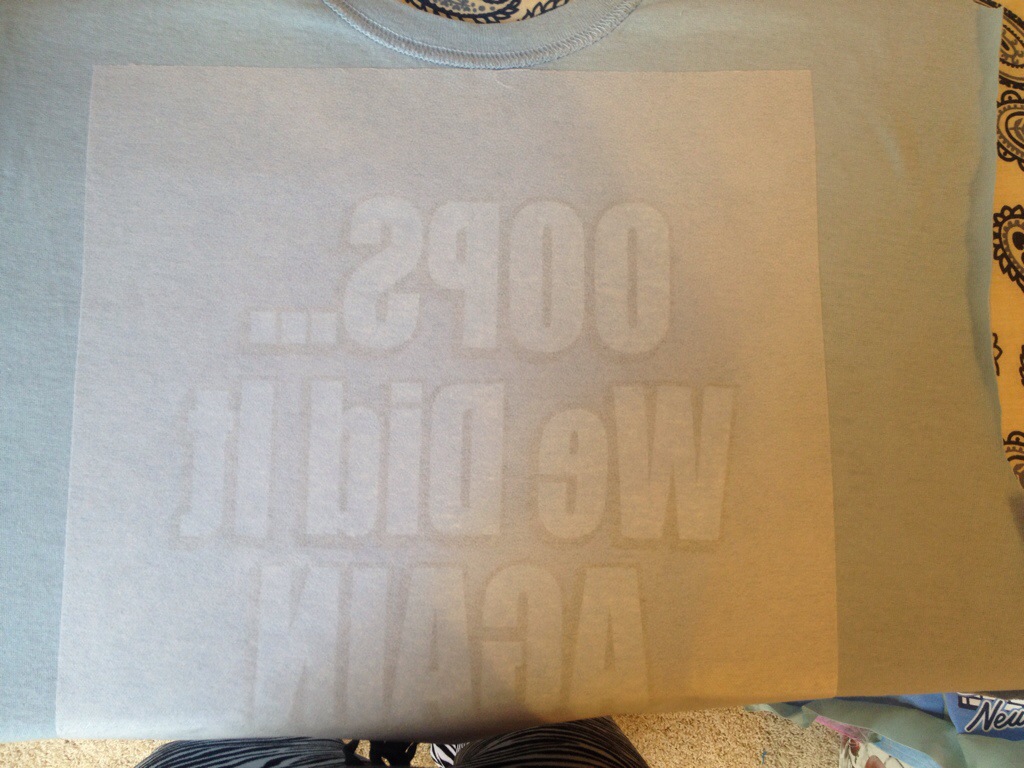

- Next you should cut your t-shirt blocks. THIS IS THE MOST IMPORTANT CUT. If you mess this up, the shirt is ruined and you can’t really fix it. You should cut the shirts 0.5″ longer and wider than your intended final block size for the 0.25″ seam allowance all the way around the shirt. My blocks were cut 13″ x 13.” The acrylic ruler and cutting mat will really help you make a perfect square. The better your cuts, the better everything will fit together later.

Tip: If you are using sheet sets, I would suggest washing them before any of the following steps to remove some of the wrinkles caused by the packaging. I washed one sheet, didn’t wash the other, and regretted that decision.
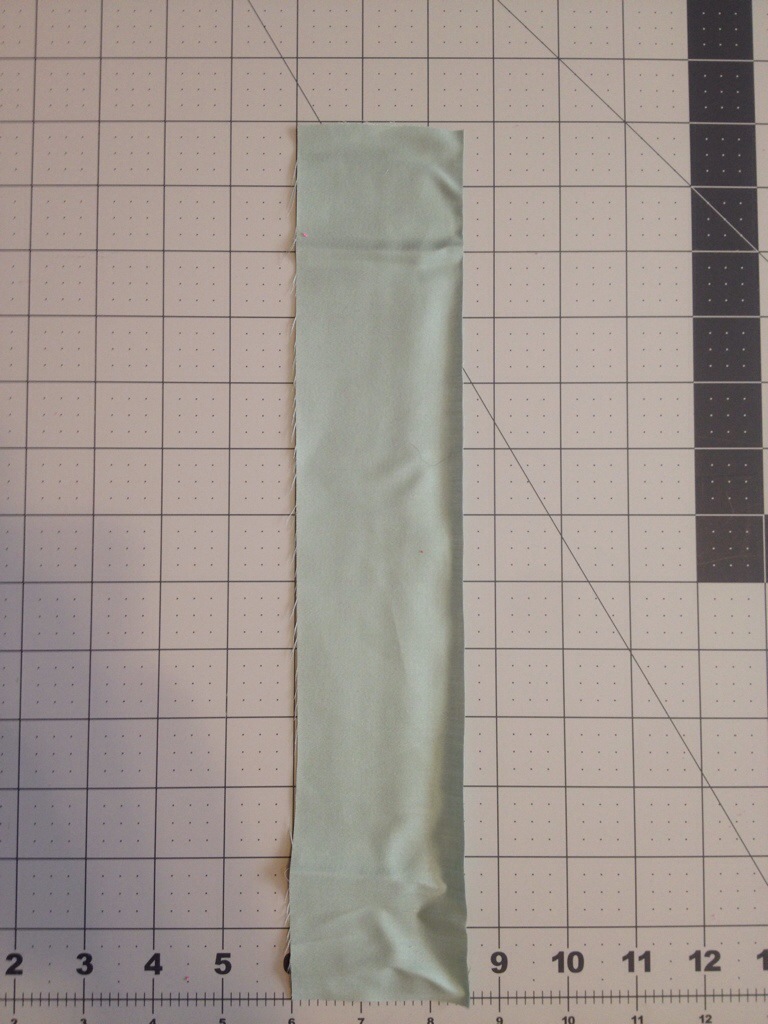
- Next you should cut strips out of whatever fabric you are using for the front. This may be a fitted sheet, a flat sheet, or fabric bought from the store. In my case, I was provided a solid sheet to use for the front and a patterned sheet for the back. You will have two types of strips. One will be the length (or width) of the quilt. The other will be the same length as your t-shirt blocks. All of my horizontal strips were the width of the quilt (104″) and all of my vertical strips were the length of the t-shirt blocks (12.5″). In retrospect, I would have made the two outer vertical strips the full length of the quilt to ensure that all of my edges were perfectly straight. Since it is very difficult to make extremely long perfect cuts, I would suggest cutting every strip as if it will be your longest length. If you make a mistake, you can always cut “good” parts of that strip into short segments for your shorter strips. The two strip sizes I used, accounting for 0.25″ seam allowances, were 2.5″ x 104″ and 2.5″ x 13.” I cut 8 long strips and 56 short strips. A short strip is shown below.
- Iron your strips. If you are piecing your quilt together the same way I did, pin a short strip to each vertical edge of the first block of a row (left-most block), right sides facing. With your piecing thread color, sew each strip to the shirt using 0.25″ seam allowance.
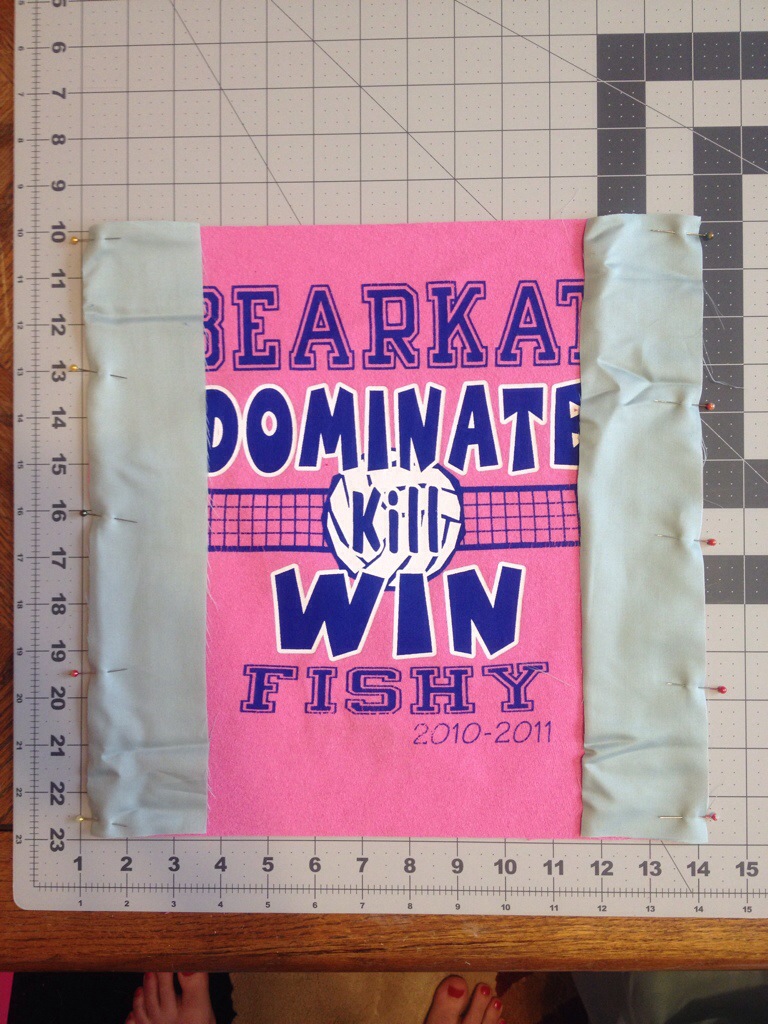
- Pin the left side of the next t-shirt block to the right strip in the same manner. Pin another strip to the right side of the new t-shirt. Sew the strips to the shirt using 0.25″ seam allowance. Continue in this manner until the entire row is pieced together. Repeat the process until each row is sewn together.

- Choose which way you want your seams to face. I found it most natural for them to face out from the strips. Press your seams in whatever direction you choose.

- Starting with the top row, pin a long strip to the top and bottom of the row, right sides facing. Sew the strips on allowing 0.25″ seam allowances. Pin the top of the next row to the bottom strip from the previous row and pin a new strip to the bottom of the same row. Sew the strips to the row. Continue in this manner until the entire quilt is pieced together.
- Choose a direction for your seams and press them into place. I found that the seams naturally wanted to be pressed inward towards the long strips.

- Next you should cut your batting. The batting should be slightly larger than you pieced quilt front. Because my quilt was so large, I had to splice three pieces of batting together. I did this by butting the edges of the batting against each other and whip stitching them into place by hand. They splice is completely undetectable from inside the quilt.
- Similarly, you should also prepare your backing. If you are using a sheet that is practically the same size as your front, then you don’t have to do anything besides try to eliminate wrinkles. You may have to cut your backing or piece together multiple pieces of fabric to create your backing. It should also be a little larger than your front.
- The next step is to create a sandwich consisting of your backing, your batting, and your front. You can either baste or pin your sandwich together. I suggest using small, curved safety pins. I used about 300 of these and about 100 large basting pins. The larger safety pins often got in the way. To make your sandwich, you need to center the three layers then pin them together about every 3 to 4 inches in both directions. All layers should be smooth without any fabric bunches. I pinned at the corners and midpoints of each t-shirt because I was going to be quilting in the strips. I created my sandwich right-side-up with the backing on bottom, then batting and top. Because my quilt was so big, I had serious problems with the bottom layers bunching up as I tried to pin everything. It took me over four hours to get it decently smooth. I was so sore the next day!
Tip: I saw a tip online after the fact that would have likely helped. It suggested starting with your sandwich upside down with your backing on top. It suggested pinning the backing straight upside down, flipping everything over and pinning it again right side up, then removing the pins from the back. I haven’t tried this method. It would require a lot more pinning, but would probably have saved me a lot of frustration.

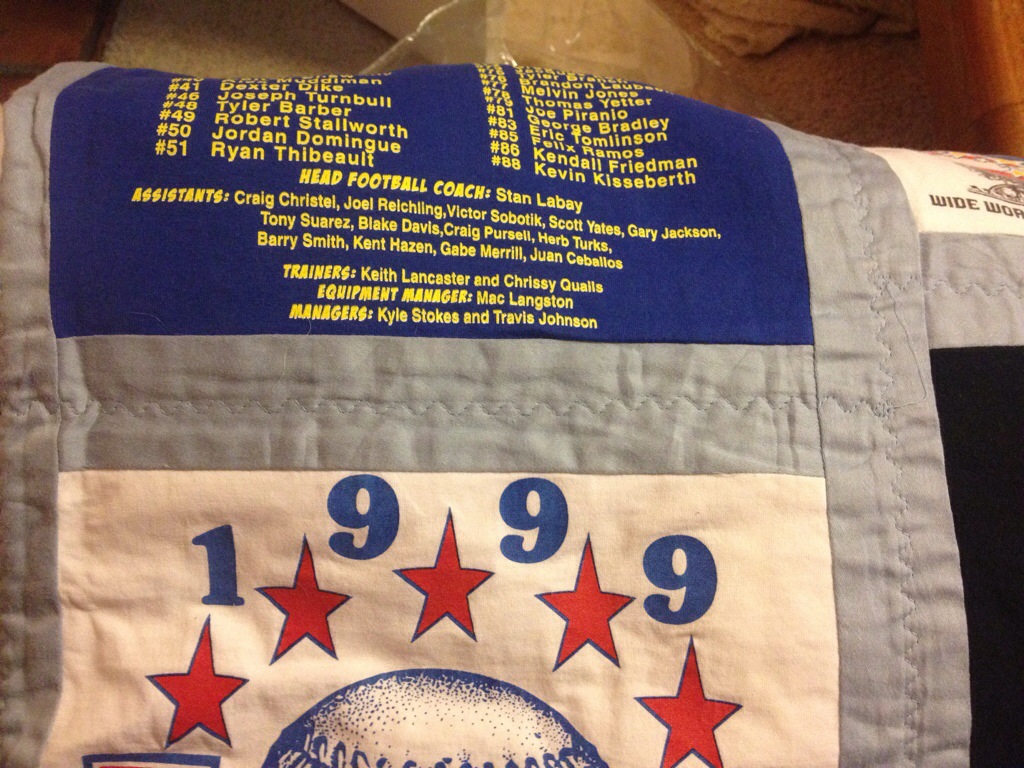
- Now it is time to start quilting! (Yes. You’ve done all of this work and haven’t started quilting yet.) There are lots of quilting methods out there. You need to choose one. The example quilt my client let me borrow had a wavy stitch down the center of each strip. I very much didn’t like it and wanted to do something else. A commonly used method is to simply stitch 0.25″ on the inside of the seams on each piece of fabric on your pieced together top. Since the design on some of the shirts went all the way to the edge, it would look odd if I stitched on the inside of the shirts. Instead, I decided to stitch 0.25″ on the outside of each t-shirt. However, I soon realized that I wasn’t going to be able to turn corners on my machine because the quilt was so big. I was only going to be able to stitch straight lines. I decided to stitch a straight line the length and width of the quilt 0.25″ from the seam along each strip. This would frame the shirts and put a small square at each strip intersection. I chose a green quilting thread that was several shades darker than the fabric I was sewing on so the stitches would stand out.

- You should start stitching in the middle of your quilt and move outward. I had a lot of problems because of the size of my quilt. I’m not going to go into all that, I’m just going to tell you what worked for me. Before I sewed a strip, I had to pin the back of the strip with straight pins every few inches making sure the pack was smooth. I pinned the same locations in the front and removed the pins in the back. I then sewed that line using a walking foot on my machine that is specially designed to help a user sew bulky fabrics/quilts. I used the stuff and fluff method.


- After all of the quilting is done, you can trip the backing and batting so that the raw edges match that of your front. You can also remove all of your safety pins.
- Now it’s time to bind your quilt. There are various ways to do this. I used bias tape. You can buy bias tape or make your own. I made my own out of the fabric used for the backing to tie the front and back together. There are several ways to use bias tape. I used the method described here.

You’re finished! Congratulations!


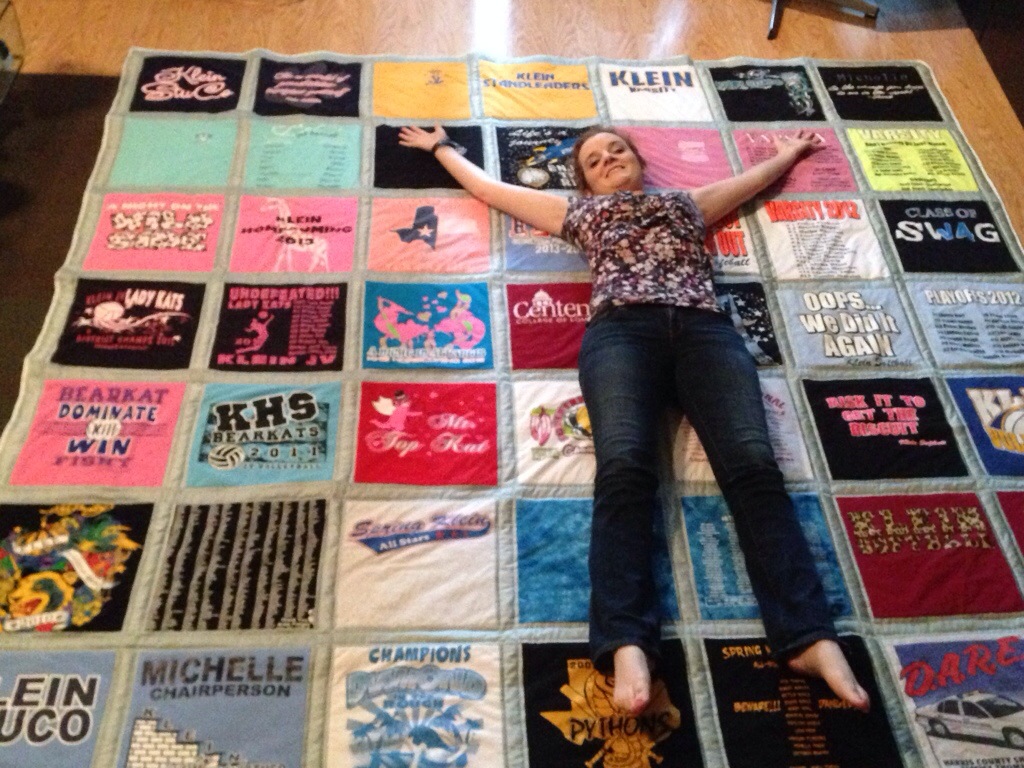
You may have to get creative. Two of my blocks had to be larger than 12.5″ or something important would be cut off. For example, you’ll notice that the two gold blocks in the first row are offset. One is larger and one is smaller. Roll with your creativity!
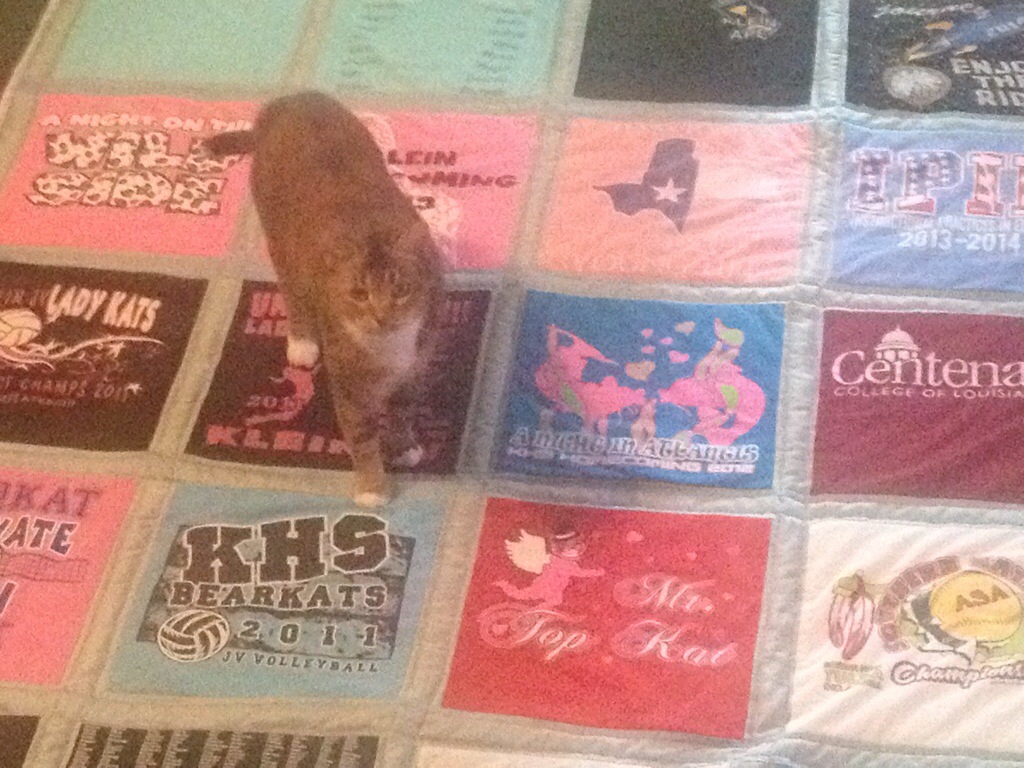
She helped…or hindered. One of those two things.
