I so enjoyed making my own soap and needle felting it, I decided to game homemade felted soap for all the females in my family for Christmas. When my sister and cousin came into town to visit, I recruited their help as well. They turned out absolutely adorable!
Crafts
Needle Felted Cat
I couple of months ago I decided to needle felt our cat. Well not actually stick needles in our cat. I wanted to make a needle felted replica of our cat. I had made a couple of simple needle felted projects, but I really wanted to try to make an animal. I had seen gorgeous projects on Etsy and was dying to try my hand at it. I started with a pipe cleaner frame and just reform added wool fiber until I had the shape and colors I desired. I loved how this turned out! The pictures really tell the story.
Difficulty: Difficult
Time Required: 6 Movies
Overall Experience: Excellent
Appalachian Trail Plaque
As I mentioned in my Appalachian Trail Koozie post, for Secret Santa at work, I drew a colleague who had recently hiked the entire Appalachian Trail (AT). I was looking for a cool AT themed gift. I found some really cool signs/plaques on Etsy, but they were outside of the Secret Santa budget. I decided to make my own. I bought a wooden plaque from Michaels. I then made my own stain by putting some old steel bolts in vinegar overnight. (I had seen the idea on Pinterest.) It brushed on clear, but turned the wood a nice vintage-like brown/grey. Using PowerPoint, I designed a hiker on a trail. Using the same method I used for my wedding signs, I transferred the design to the plaque. It turned out great, and he loved it!
Difficulty: Easy
Time Required: 2 Movies
Overall Experience: Excellent
Appalachian Trail Koozie
Purple and Gold Multiplicity
I decided to knit a Multiplicity purse for my sister since I loved mine so much. (See my posts about Multiplicity 1 and Multiplicity 2 for the others I made.) I chose a royal purple and mustard yellow, a play on her school colors of purple and gold. The only thing I didn’t like about mine is that it didn’t close. I knit button holes into the main pocket this time and loved the product!
Time Required: 12 Movies
Overall Experience: Excellent
Cowboys Mason Jar Koozie
I haven’t written a blog post in forever. A lot of that is that it takes a lot of effort to figure out a pattern I improvised from pictures after I already gave away the actual product. I’ve been lazy. I decided to play catch up just sharing what I’ve been making. If someone wants the pattern, I am more than willing to share!
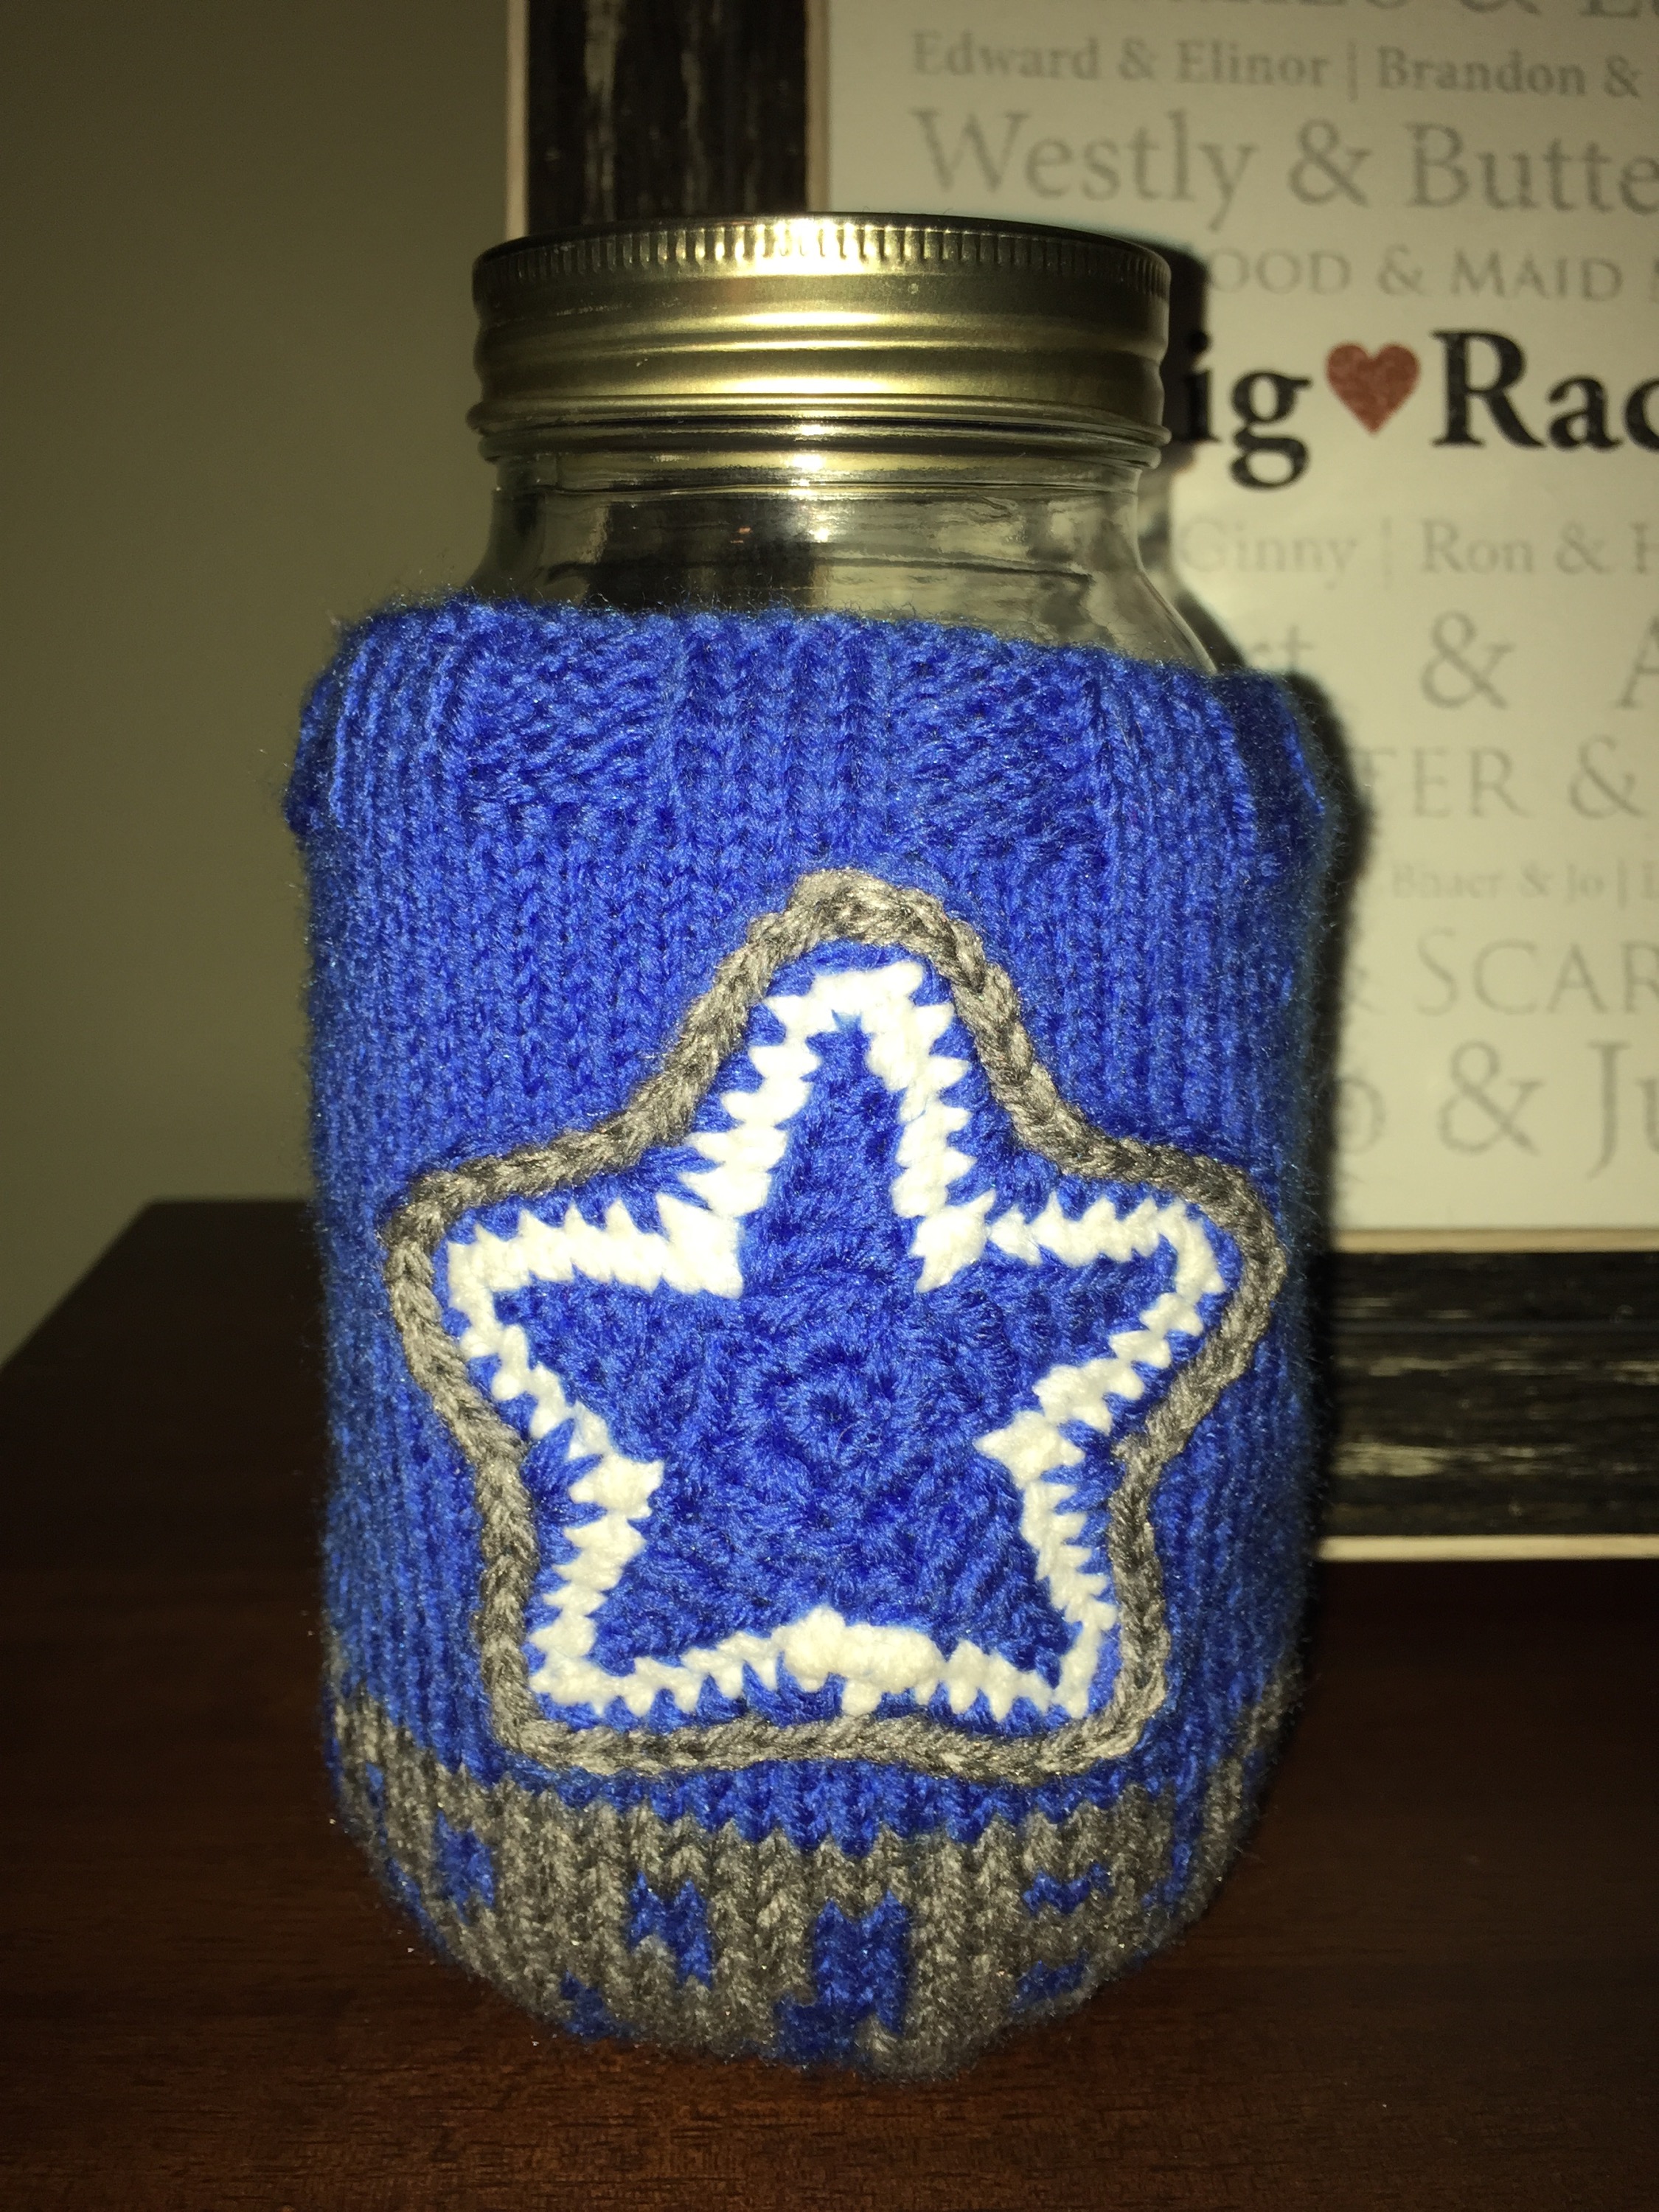
First up: a Dallas Cowboys mason jar koozie. I actually did not love how this turned out. I was knitting at a friends’ child’s birthday party and their neighbor asked if I could make them a mason jar koozie with the Cowboys logo. I said sure. I figured out a pattern for the letters, but it was really wide. Knitting with number 2 needles and worsted weight yarn (which is ridiculously tight if you know knitting) the letters went more than halfway around the jar. The only way I was going to get the letters on the front was to use super fine yarn. That would have been a crazy number of stitches, and I would have to buy new yarn instead of using stash yarn. Considering I had already spent a lot of time ripping out my work to even get the letters mostly on the front half of the jar, I really didn’t want to go through any more effort. Next I tried several different crochet star patterns, none of which were pointy enough. Lastly, the letters ended up too low. I’m a perfectionist. Here is how it turn out. Not my best work.
Difficulty: Easy
Time Required: 6 Movies (Due to a lot of ripping out)
Overall Experience: Meh
Glass Etching
My amazingly talented friend Shanda (see my soap making and felting posts) taught a group of ladies glass etching a couple of weeks ago. The process is quick and easy. The product is beautiful!
Materials Needed:
- Glass for etching
- Etching cream (we used Etchall)
- Rubbing alcohol
- Paper towel
- Spatula
- Stickers, painters tape, or cut vinyl to create your design
- Transfer paper may be useful to transfer intricate designs to your glass.
Instructions:
- Clean your glass using the rubbing alcohol and paper towel
- Create a design using stickers, painters tape, or vinyl. Shanda has a dye cutter and cut all of our initials for monograms using vinyl.
- We adhered the monograms to transfer paper, removed any part of the dye cut design we wished to be etched, adhered the vinyl directly to the glass. We then thoroughly rubbed on the design to make sure that it was well adhered. Any bubbles near the edge of the design would allow the etching cream to run into that bubble and create a less crisp edge. We also cut painters tape around our designs to give us a larger buffer in case the etching cream ran.
- Next, we applied the etching cream on the vinyl next to the design. We then used a spatula to evenly drag a thick layer of cream across the design.
- Allow the etching cream to work for the specified period of time (15 minutes in our case). Scrape off the access cream and replace it in the jar (it is reusable). Wash the glass and remove the stickers. Voila!
- We also monogrammed mosaic tiles to create pendents. The etched glass didn’t show up as clearly on the colored tile, so we added Rub n’ Buff to add a little contrast.
Difficulty: Easy
Time Required: 1 hour for 4 jars
Overall Experience: Good
Felted House Slippers
I had been wanting to try a technique where one knits an object using 100% wool then washes it to create felt. I found an adorable house slipper pattern and decided my friend needed them for her birthday. I knew that the slippers would shrink during the felting process, but I couldn’t believe how big they were knitting up! They ended up shrinking down to the perfect size. Here they are next to a pair of my Toms pre-felting. Huge, right!?!
The pattern called for straps to simply be sewn on the toes; however, the stitching was quite obvious. I used the needle felting techniques I used for my soap and pumpkin to make the seam nearly invisible.
Lastly, I added vintage-looking buttons. I love them and need to make some for myself!
Difficulty: Easy
Time Required: 3 Movies
Overall Experience: Good
Baby Baseball Hat
In honor of Craig Biggio being elected for the baseball hall of fame today, I will finish my summer of baby hats (I know… I’m super behind. Other hats included: Chappy Newsboy Cap, Lacey Summer Baby Cap, Elmo Inspired Baby Hat, and Emory Beanie.) with my baby baseball hat. Some friends of mine are huge Astros fans, so when they had a baby I naturally wanted to make them a baseball hat. I had seen pictures of hats I liked, but couldn’t find a pattern. I ended up remaking the Chappy Newsboy Cap with same alterations. Instead of single crocheting in the front and back loops, I single crocheted in both loops to give a smoother texture. I crocheted the hat in white with a red brim and embroidered baseball stitching over the white. It turned out super cute!
Difficulty: Easy
Time Required: 2 Movies
Overall Experience: Good
Bugs Bunny Carrot Koozie
As mentioned in my last post, I’m way behind on my blog. There are things I made in August that haven’t been added yet! I decided to start the posting with something quick and easy. A coworker asked if I could create a beer bottle koozie that looked like a carrot for his Bugs Bunny costume. Challenge accepted! I improvised the carrot using alternating groups of rows of knits and purls to give the carrot texture. I also created a large cartoony leaf that snapped to the bottom to give the effect of Bugs’ carrot. It turned out great!
Difficulty: Easy
Time Required: 2 Movies
Overall Experience: Good